-
CICD (GitHubActions + EC2 + RDS + S3 + Code Deploy) - EC2 설정 정리AWS 2023. 7. 30. 19:29728x90
EC2 설정
인스턴스 시작하기
1. 운영환경 : UBUNTU 로 인스턴스 생성하기.
유형 : 프리 티어로 사용
2. 키페어(로그인) : .pem key 만들기 : 나의 ec2서버에 접속하기 위한 키. 해당 .pem key파일은 잘 관리를 해야한다.
3. 네트워크 설정 : 기본
4. 스토리지 구성 : 프리티어를 사용하는 유저의 경우 최대 30gb까지 허용을 해주고 있다.
5. 요약: 인스턴스의 갯수를 설정할 수 있는데, 이 때 EC2 Auto Scaling 고려하여 인스턴스를 1개 이상 세팅이 가능
태그 지정
태그를 지정하는 이유는 나중에 code deploy와 연동을 할 때, 태그 그룹을 지정할 수 있다. 이 때, 우리의 ec2 서버의 정보를 알려주기 위해서 태그 값을 설정해주는 게 좋다.(기본은 나의 ec2이름으로 설정되어있음.)
인바운드 설정
나의 인스턴스로 들어올 수 있는 IP를 제한하는 설정을 하는 곳이다.

인바운드 규칙을 설정할 땐, 나의 EC2서버의 포트로 모든 IP가 허용되게 하기보단 필요에 맞게 설정을 해주는 것이 좋다.
탄력적 IP 설정
EC2서버는 기본적으로 서버가 닫히고 열릴 때, IP가 변경된다. 때문에, 고정된 IP를 사용하기 위해선 탄력적 IP가 필요하다. 탄력적 IP는 생성 후에 EC2 서버에 MAPPING을 해주어야 한다. 이는 고정된 IP를 사용하는 만큼, 사용하지 않는 EIP에 대해서는 과금이 부여되기 때문에 실행하는 EC2에 바로 연결을 해주고, EIP를 연결한 EC2를 사용하지 않는다면, 해당 EIP를 지워주어야 과금이 일어나지 않는다.
EC2에 접속 후 기본 세팅해주기
1. .pem키를 이용하여 ssh 클라이언트로 접속을 한다.
ssh -i "myPemKey.pem" ubuntu@[ec2서버의 IP 또는 DNS 주소]2. 깡통 EC2를 최신으로 만들어주기.
sudo apt update && sudo apt upgrade
3. java && code deploy 설치하기sudo apt install openjdk-xx-jdk버전확인 >> java -version
code deploy ubuntu에서의 설정은 다음의 자료에서 볼 수 있다.https://docs.aws.amazon.com/codedeploy/latest/userguide/codedeploy-agent-operations-install-ubuntu.html
Install the CodeDeploy agent for Ubuntu Server - AWS CodeDeploy
Writing the output to a temporary log file is a workaround that should be used while we address a known bug with the install script on Ubuntu Server 20.04.
docs.aws.amazon.com
sudo (apt-get / apt) install ruby-full
sudo (apt-get / apt) install wget
cd /home/ubuntu >> 이동
wget https://{{bucket-name}}.s3.{{region-identifier}}.amazonaws.com/latest/install
우리는 위의 명령어를 입력하기 위해서 2 군데 정보를 주어야 하는데, bucket-name은 CodeDeploy Resource Kit 파일이 포함된 Amazon S3 버킷의 이름이며 region-identifier해당 지역의 식별자를 말한다.
참고 링크 : https://docs.aws.amazon.com/codedeploy/latest/userguide/resource-kit.html#resource-kit-bucket-namesCodeDeploy resource kit reference - AWS CodeDeploy
CodeDeploy resource kit reference Many of the files CodeDeploy relies on are stored in publicly available, AWS region-specific Amazon S3 buckets. These files include installation files for the CodeDeploy agent, templates, and sample application files. We c
docs.aws.amazon.com

>> wget https://aws-codedeploy-ap-northeast-2.s3.ap-northeast-2.amazonaws.com/latest/install
>> chmod +x ./install
>> sudo ./install auto > /tmp/logfile : 관리자 권한으로 현재 디렉토리의 install 프로그램을 auto 인자와 함께 실행하고, 그 결과를 /tmp/logfile에 저장하라는 의미
>> sudo service codedeploy-agent status : 서비스가 실행 중인지 확인
다음은 ec2 서버의 IAM 설정을 해주어야 한다.IAM > 역할 > 역할 만들기
- AWS 서비스 , 사용사례 : EC2

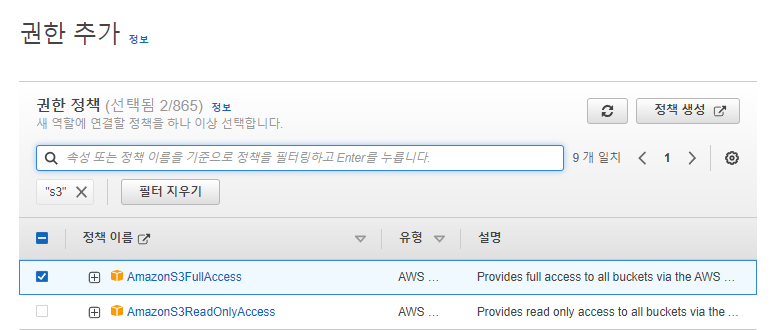
결과적으로 ,

역할 이름을 부여하고, 역할 생성을 누른다.
EC2 서버로 돌아간뒤, 우리가 사용하려는 EC2 서버에 연결을 한다.
EC2서버 우클릭,

여기까지 EC2 에 CodeDeploy 를 세팅하는 것은 기본적으로 끝났다.
**추가**
pem 키로 접속하는게 아닌 비밀번호로 접속하기
1. ssh_config 파일 수정
sudo vi /etc/ssh/sshd_config → PasswordAuthentication no > yes 로 변경
2. sudo su - : root계정으로 접속
3. passwd ubuntu 입력 후 비밀번호 설정
4. sudo service ssh restart
5. ec2 서버 재접속 >> ssh ubuntu@[주소]
여기까지 따라 왔다면, 비밀번호를 설정하는 방법으로 변경이 된다.
이러면 pem 키가 없어도 어디서도 접속이 가능하다!
'AWS' 카테고리의 다른 글
